

NotebookLM is simple right out of the box. Upload your own sources or do a deep research with Gemini, prompt it and get grounded answers in seconds with citations. The defaults from NotebookLM are satisfactory. But the defaults are polite, middle-of-the-road answers that just scratch the surface. We can eke out more as there's a configuration layer under the hood. NotebookLM gives us quite a few controls to tweak its behavior and build our study tools. These five settings take less than five minutes to set up. It could mean the difference between using an intelligent document reader or a bespoke research assistant.
There's a NotebookLM prompt that gives you a bird's-eye view of everything you've uploaded
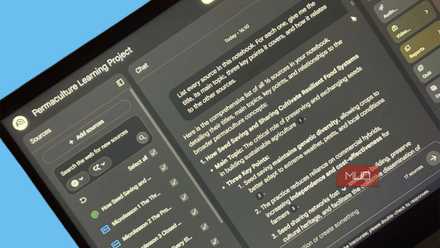
The Master Index prompt is the first thing to run in any NotebookLM notebook.
Custom instructions improve every response
Tell NotebookLM exactly what you want from it
Custom instructions are the most critical setting in NotebookLM. You'll find them under the slider icon at the top of the Chat panel. Click it, select Custom, and you get a text field where you can define a role, tone, output format, and context. Think of it as a meta-prompt exclusive to that notebook. Whatever you write there shapes every response and also every Studio output until you change it.
I used to restate some bits of context in every prompt. Now I give each notebook its own "personality" before I type a single question. You can see an example in the screenshot. The character limit is 10,000 characters (around 1,600 words more or less), so you can write an entire article worth of instructions. Even then, be precise with your instructions. Like the best NotebookLM prompts, context, a detailed role description, ideal audience, your preferred format, and your goals matter.
Create your own template for the custom instructions. Apart from other parameters, include a Do's / Don’t list and 1–2 micro examples of “good output.”
Response length controls how much you get
Tell NotebookLM to be brief or exhaustive

Right below the conversational style setting, you'll find a response length toggle: Default, Shorter, or Longer. Shorter mode gives you tight, scannable answers. Longer mode expands explanations and adds more supporting detail.
I switch this constantly depending on the matter. When I want quick lookups across a dense research notebook, Shorter keeps things moving. When I'm trying to fully understand something unfamiliar, Longer gives me the depth I'd otherwise have to prompt for.
Does this matter that much when you can just ask a follow-up? I think the difference is apparent for Studio tools like Audio Overviews and Reports. Getting the length right before generating makes their outputs fit your goals.
Selective sources focus your output
Don't let every source compete for attention

Every source in your notebook is active by default. That means when you ask a question or generate Studio output, NotebookLM pulls from all of them. But sometimes you only care about two of your twelve sources. The checkbox next to each source in the Sources panel lets you temporarily deactivate the ones you don't need right now. You can also automatically organize with Labels in NotebookLM. Select or deselect the right labeled clusters.
If I decide to use Labels, then I add a short section in the Custom instructions that explains what each label means. For instance, I can instruct it to focus on a specific label first and make it clear when it's drawing from other labels.
You can rename labels, too. Labels can help narrow the focus for a specific session or output, and then you can restore everything with a click.
Studio outputs are fully customizable
Guide the Studio tools before hitting generate

Every tile in the Studio panel — Audio Overview, Video Overview, Flashcards, Quiz, Slide Deck, Infographic, Data Table — has a little sideways caret next to it. Most users tap the tile and let NotebookLM decide how to structure the output. But clicking that caret first opens a customization panel where you can specify length, format, language, and add a custom prompt that directs the content.
I generated several Audio Overviews before I realized the banter was getting a bit too monotonous. Once I added a custom prompt to the Audio overviews, the output felt a lot different.
The options vary by output type. Audio Overviews let you choose format and length. Video Overviews add visual style. Slide Decks give you short or default layouts. Each has its own set of controls. The common thread is that using them allows you to tailor them.
Quiz and flashcard settings sharpen your study tools
Choose Easy, Medium, or Hard (it matters!)

When you generate flashcards or a quiz via the sideways caret icon, you can set the difficulty level (Easy, Medium, or Hard), specify how many cards or questions you want, and add a custom prompt to narrow the focus. Without these settings, NotebookLM defaults to medium difficulty, which works fine for any general review.
For material I mostly know, I set quizzes and flashcards to Hard mode. The exercises get a bit more challenging. For the first time, go with Easy mode as it builds the basic understanding first. Use the custom prompt field to target specific concepts, themes, or even audiences.
I've used the prompt field to generate quizzes focused on a single chapter rather than an entire book. It's a minor step, but the output becomes far more targeted than the scattershot of the default.
Compare with the custom instructions in your next notebook
Most of these settings live in two places: the slider icon in the Chat panel and the caret icon in the Studio panel. None are secret or hidden. They are just easy to forget. Open one of your existing notebooks and see how custom instructions change the response you get to your prompts.